I know I've been away for too long and you know, honestly, it's not like I didn't want to come in here. I just prefer living the offline life these days for some reason I don't know of! Maybe it's a phase, or maybe I am changing for good. Am I growing up to become one of those aunties who scowl at their children wasting their time online? :S I sincerely hope not !!
So, anyway, Diwali was crazy this time. I did so much I didn't realise how the time flew and before I knew it, the festivities were over! On the first day, we decked up in sarees and went to a Chinese restaurant for dinner. It was fun dressing up like that and going out somewhere.

I prepared chocolates, candles, drew rangolis, celebrated Bhaubeej and even saw Golmaal 3 which I ended up liking, to my surprise! Golmaal 1 was okay-ish and I wasn't really keen on watching this one but I must say it's far better. I didn't laugh as much as the people around me did but I did manage to enjoy a few good one-liners in the movie.
As I said, this Diwali, it was candles in place of diyas- scented, decorated gel candles made by me! :) The process is pretty easy but I'd still like to share it with y'all. :)
All I needed is some assorted glasses, gel wax, wax dyes, wicks, aromatic oil, opaque acrylic all-surface paints and embeds (beads, magic balls etc.). I got all of this from a shop in Crawford Market, Bombay.
You need to coat the wicks with wax first so you heat a little wax just enough for the wicks. I didn't have a microwave then, so I used the double boiling technique.
Double boiling technique: I filled an aluminium vessel with some water and kept it on the burner, then placed a steel container inside it which had the wax. You have to make sure the water doesn't enter the steel container though i.e. the water shouldn't mix with the wax.
I wish I had taken pictures while I was making the candles so you could have had a better idea of all of this. :(
Keep stirring the wax till the bubbles reduce and till the wax melts. You can now put in the wicks at once but don't let them stay in for too long. The wax solidifies in seconds so you can take the wicks out in less than a minute to get fully coated wax wicks.
You can now proceed to making the candles. You will need to heat some more wax (as per the size and quantity of your containers). Gel wax is reusable so it's okay to overestimate. Once the wax melts, you can add a couple of drops of the dye you want and keep stirring. The quantity of dye you add depends on how dark or light you want the colour to be but to be safe, add a little of it first because the wax catches colour quickly.
You can now start pouring the wax in the container while keeping the wick inside. You can use a setup like this so that the wick stays in the center:

This image has been Googled for.
If you don't want the wick in the center, then you can just leave it leaning against the container. Don't pour the wax all at once. For scented candles, the aromatic oil has to be added just before adding the last layer of wax. This is so that the scent does not evaporate. So you can fill 3/4th of the container with wax, then add a couple of drops of the oil and pour in some more wax again.
Also, this is the part where you can get creative by adding embeds. I used magic balls and beads. You can add shells too- they give it a whole different look!
Magic balls are balls which grow in size when you soak them in water. I added some of these magic balls while pouring in the wax i.e. I added them in between layers of hot wax. Some I added after pouring all the wax, but I later noticed that these balls were shrinking back to their original size when exposed to air so it's better that if you're planning to use these, you put them in between layers of wax.
Beads can be added after pouring in all the wax just when the wax is still in the liquid form. They'll automatically stick to the hot wax. You can also add beads in between layers of wax- it's all upto you.
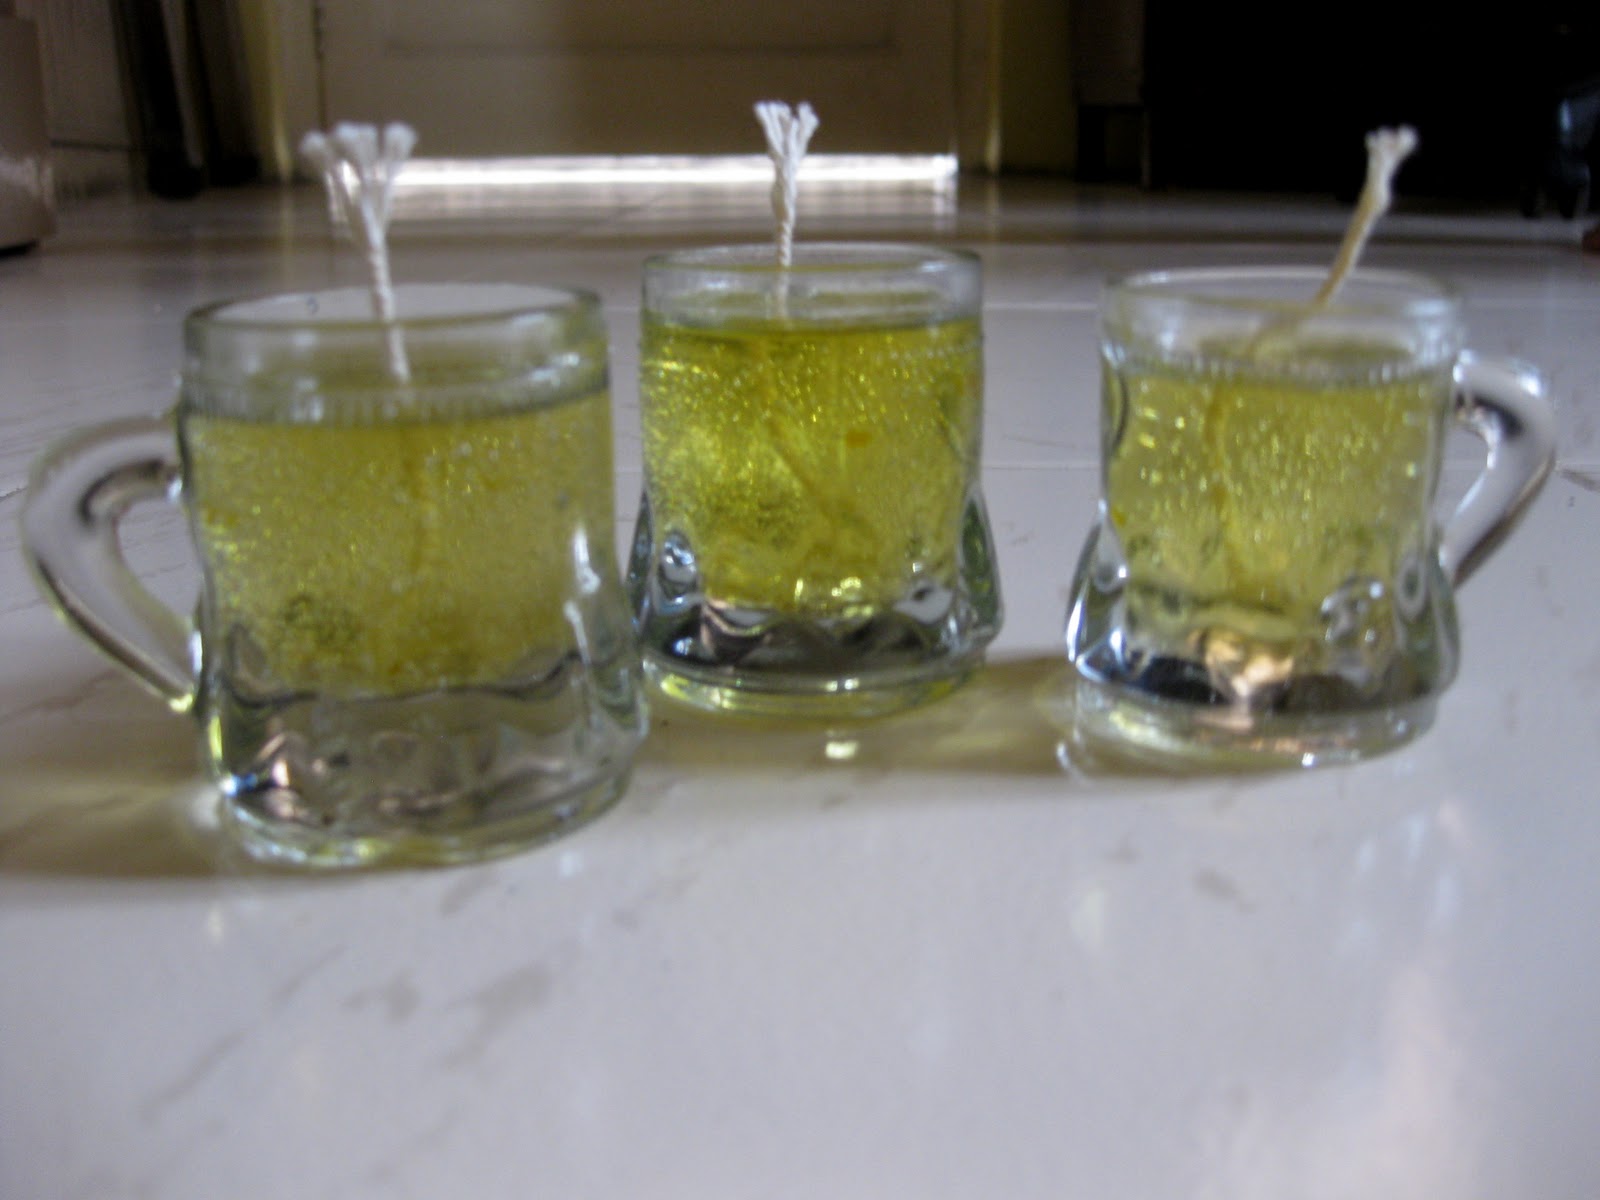
Lastly, you can paint these glasses/containers using acrylic all-surface paints or stick some stickers on them to make them look attractive. I used paints, star and heart shaped stickers, satin ribbons etc.
And this is how it all looked like in the end:
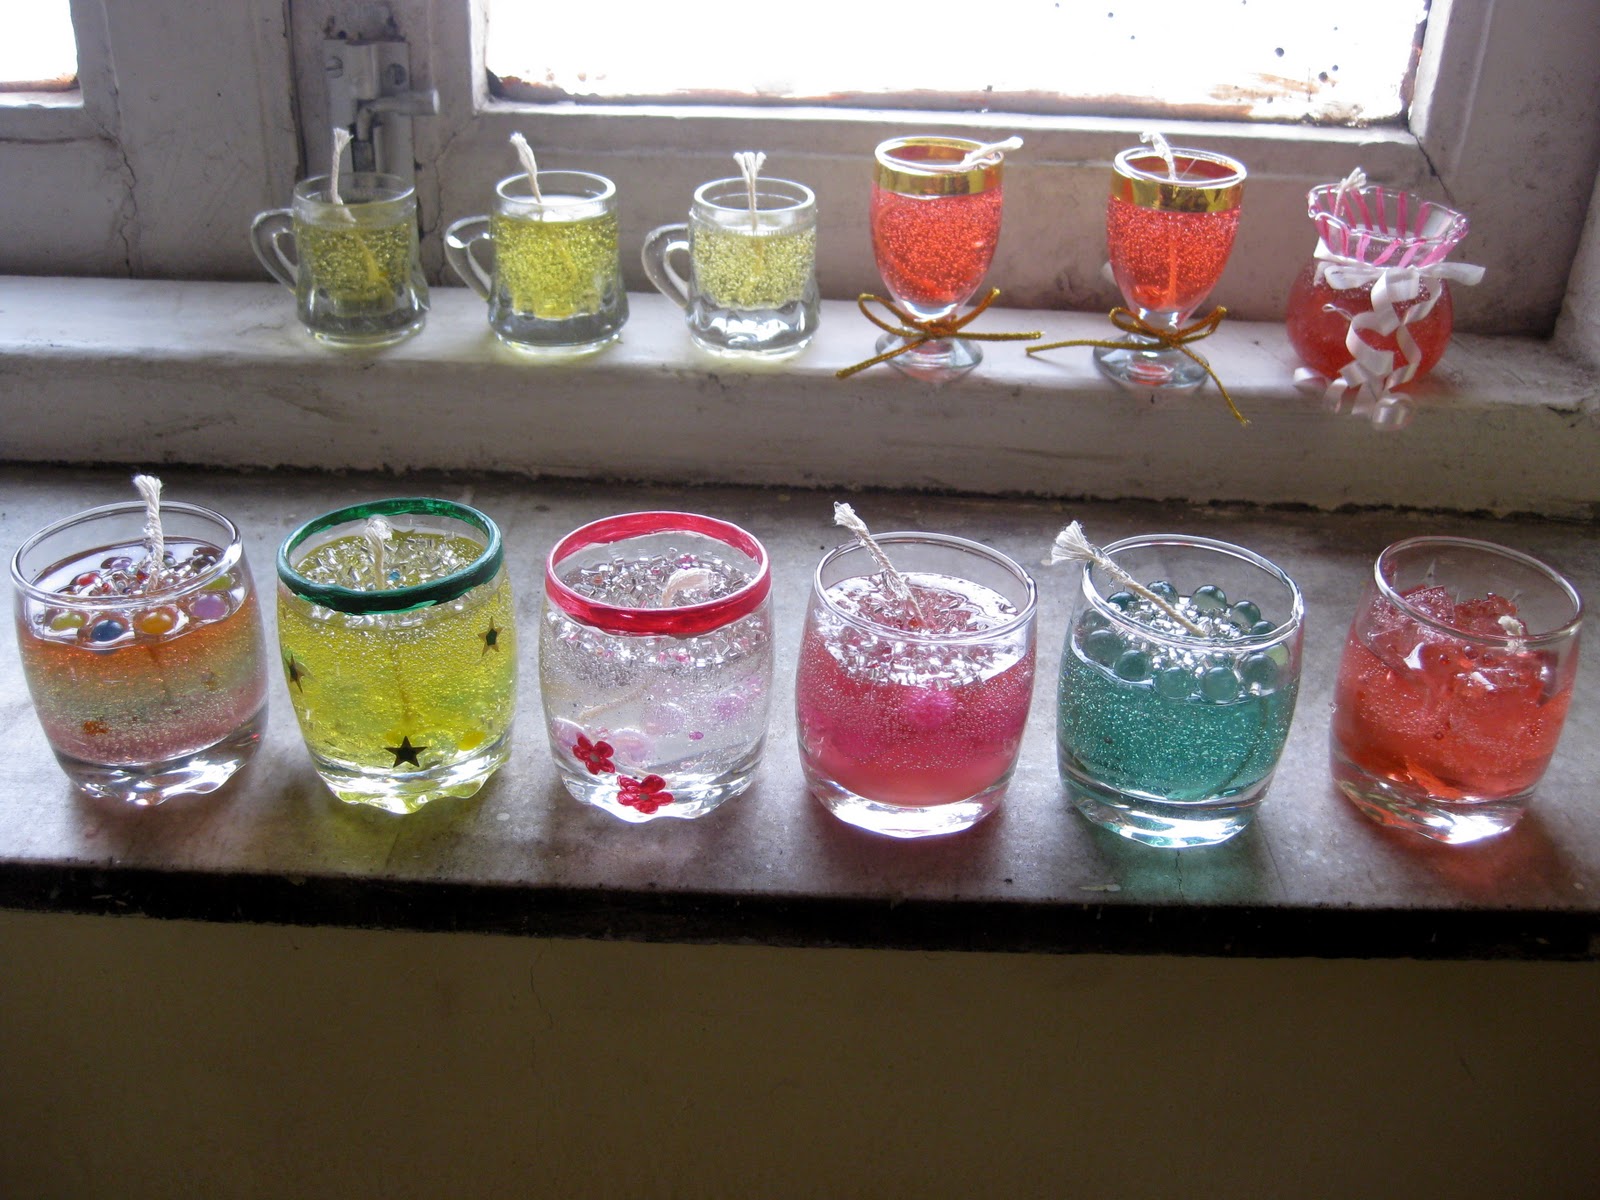

You can notice the size of the magic balls in the first container here. Some of these balls are slowly shrinking to their original size due to exposure to air. So it's advisable to add them in between the wax if you're planning to use them, to retain their enlarged size. The white and some coloured beads have been added at the end when the wax was still hot.
Cheers!


The flower rangoli and the chocolates :


More pictures here.
I'll try to keep coming in here as and when I get time. Till then, take care! :)